Creamy Red Velvet Cookies Frosted, Easy 55m recipe
Creamy Red Velvet Cookies Frosted Recipe: A Deliciously Decadent Treat
Table of Contents

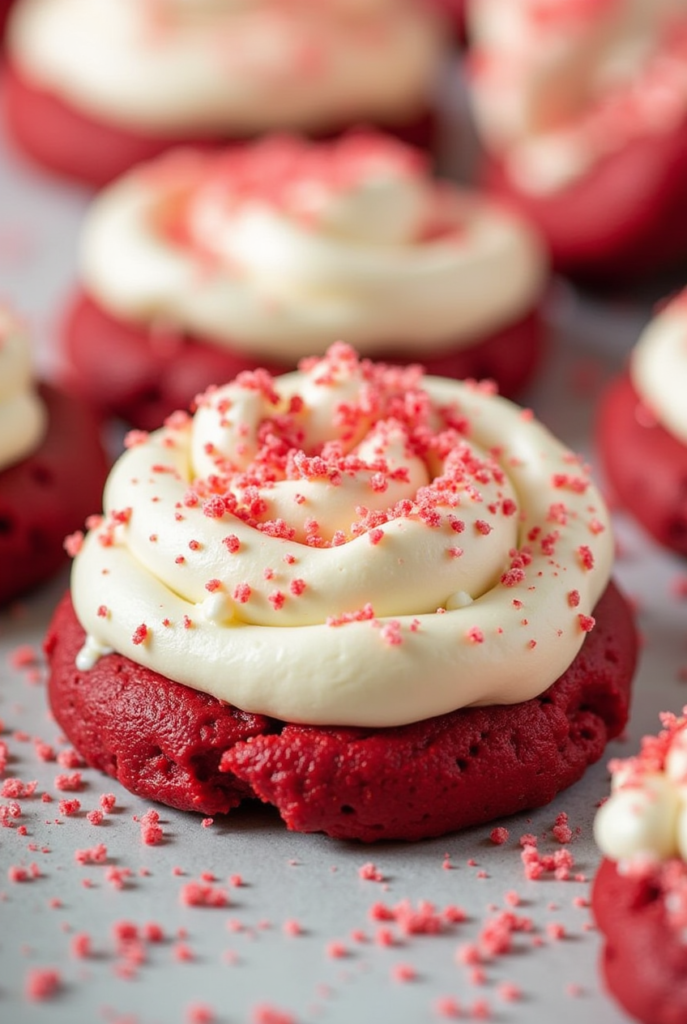
Looking for a treat that combines the richness of red velvet with the creaminess of frosting? The Creamy Red Velvet Cookies Frosted recipe is a perfect match for any celebration, holiday, or special occasion. These soft, chewy red velvet cookies topped with a luscious cream cheese frosting are a guaranteed hit. With their vibrant color and irresistible flavor, they’ll quickly become your new favorite dessert recipe. Let’s dive into how to make these delightful recipe!
Key Ingredients and Their Roles
In the Creamy Red Velvet Cookies Frosted recipe, each ingredient serves an important role to create the perfect combination of flavor and texture:
- Butter: Adds richness to the cookie dough, making the cookies soft and tender.
- Sugar: Sweetens the cookies and helps create a crisp edge while keeping the centers chewy.
- Eggs: Provide structure to the cookies, binding the ingredients together and adding moisture.
- All-purpose Flour: The main structure of the cookie dough, giving the cookies their texture and softness.
- Cocoa Powder: Adds a subtle chocolate flavor that enhances the red velvet taste.
- Baking Powder: Helps the cookies rise and become fluffy.
- Buttermilk: A key ingredient in red velvet treats that provides moisture and a slight tang, which balances the sweetness.
- Red Food Coloring: The iconic red color of the cookies, giving them their signature hue.
- Cream Cheese: The base for the frosting, providing a creamy, tangy flavor that pairs perfectly with the sweetness of the cookies.
- Powdered Sugar: Used in the frosting to sweeten it and give it a smooth texture.
- Vanilla Extract: Enhances the overall flavor, both in the cookies and the frosting.
Recipe’s Ingredients
To make your Creamy Red Velvet Cookies Frosted recipe, you will need:
For the cookies:
- 1 cup unsalted butter, softened
- 1 cup granulated sugar
- 1 large egg
- 2 cups all-purpose flour
- 2 tbsp cocoa powder
- 1 tsp baking powder
- 1/4 tsp salt
- 1/2 cup buttermilk
- 1 tsp vanilla extract
- 2 tbsp red food coloring (or more for a deeper color)
For the cream cheese frosting:
- 8 oz cream cheese, softened
- 1/4 cup unsalted butter, softened
- 2-3 cups powdered sugar (adjust to desired frosting thickness)
- 1 tsp vanilla extract
- Pinch of salt
Preparation Time
- Total Prep Time: 25 minutes
- Baking Time: 10-12 minutes
- Cooling Time: 20 minutes
- Total Time: 55 minutes
Step-by-Step “Creamy Red Velvet Cookies Frosted” Cooking Instructions
Step 1: Preheat and Prepare the Baking Sheet
Preheat your oven to 350°F (175°C). Line a baking sheet with parchment paper or a silicone baking mat to ensure the cookies don’t stick.
Step 2: Make the Cookie Dough
- In a large mixing bowl, cream together the softened butter and sugar until light and fluffy.
- Add the egg and vanilla extract to the butter mixture and continue mixing until combined.
- In a separate bowl, whisk together the flour, cocoa powder, baking powder, and salt.
- Gradually add the dry ingredients to the wet ingredients, mixing until combined.
- Add the buttermilk and red food coloring. Stir until the dough is smooth and evenly colored. The red color should be vibrant, but you can add more food coloring for a deeper shade of red if desired.
Step 3: Shape and Bake the Cookies
- Use a cookie scoop or spoon to drop rounded tablespoons of dough onto the prepared baking sheet, spacing them about 2 inches apart.
- Gently flatten each dough ball with your fingers or the back of a spoon to help them bake evenly.
- Bake for 10-12 minutes, or until the edges are slightly golden. The cookies should look soft and puffed when they’re done.
- Remove the cookies from the oven and let them cool on the baking sheet for a few minutes before transferring them to a wire rack to cool completely.
Step 4: Make the Cream Cheese Frosting
- While the cookies cool, make the frosting by beating the softened cream cheese and butter together in a mixing bowl until smooth and creamy.
- Gradually add the powdered sugar, 1/2 cup at a time, until the frosting reaches your desired consistency. Add vanilla extract and a pinch of salt, and continue mixing until smooth and fluffy.
Step 5: Frost the Cookies
Once the cookies are completely cool, spread a generous amount of the cream cheese frosting on top of each cookie using a spatula or piping bag. You can make it as thick or thin as you prefer.
Step 6: Serve and Enjoy
Once frosted, let the cookies set for a few minutes to allow the frosting to firm up. Then, serve and enjoy these delightful Creamy Red Velvet Cookies Frosted recipe!
Expert Tips for the Best “Creamy Red Velvet Cookies Frosted”
- Chill the Dough: If the dough feels too soft to handle, chill it in the refrigerator for 30 minutes. This will make it easier to shape and prevent the cookies from spreading too much during baking.
- Don’t Overmix: When making the dough, be careful not to overmix the ingredients, as this can result in dense cookies.
- Check for Doneness: Red velvet cookies bake quickly, so keep an eye on them to avoid overbaking. The cookies should be slightly firm on the edges but still soft in the center when done.
- Room Temperature Ingredients: For the best texture and consistency, make sure your butter and cream cheese are at room temperature before using them in the dough and frosting.
Presentation Tips
- Decorate with Sprinkles: Add a touch of sparkle by topping the frosting with red, white, or gold sprinkles to make them look even more festive.
- Cookie Stacks: Stack two or three cookies together for a cute and visually appealing presentation, perfect for serving at parties or gifting.
- Add Edible Flowers: For a more sophisticated look, garnish the cookies with small edible flowers, such as pansies, for a pop of color and elegance.
Creative Twists on the Creamy Red Velvet Cookies Frosted Recipe
- Chocolate Chips: Add semi-sweet or white chocolate chips to the dough for a delightful texture contrast with the soft cookies.
- Lemon Zest: Add a touch of lemon zest to the cream cheese frosting for a refreshing twist that complements the rich red velvet flavor.
- Chocolate Frosting: Instead of cream cheese frosting, try using chocolate ganache or a rich buttercream frosting for a different flavor profile.
Pro Tip for Customization
To make these Creamy Red Velvet Cookies Frosted recipe even more fun and customizable, try adding mini heart-shaped sprinkles or edible glitter on top of the frosting. This is especially great for Valentine’s Day, anniversaries, or any special occasion where you want to add a little extra flair!
FAQs
1. Can I use regular milk instead of buttermilk?
Yes, you can substitute regular milk for buttermilk, but buttermilk adds a tangy flavor that helps balance the sweetness and creates a tender texture. If using regular milk, you can add a teaspoon of lemon juice or vinegar to mimic the tang of buttermilk.
2. How do I store “Creamy Red Velvet Cookies Frosted“?
Store the cookies in an airtight container at room temperature for up to 4 days. If you need to store them for longer, refrigerate them, but be sure to let them come to room temperature before serving.
3. Can I freeze “Creamy Red Velvet Cookies Frosted“?
Yes! To freeze, place the baked cookies (without frosting) in a single layer on a baking sheet and freeze for about 30 minutes. Once frozen, transfer them to an airtight container or freezer bag for up to 3 months. Frost the cookies after thawing.
4. Can I make the frosting ahead of time?
Yes, you can make the cream cheese frosting ahead of time and store it in an airtight container in the refrigerator for up to 3 days. Just let it come to room temperature and beat it for a few seconds before spreading on the cookies.
Conclusion
This Creamy Red Velvet Cookies Frosted recipe is a must-try for anyone who loves indulgent, soft cookies with a tangy cream cheese frosting. With its vibrant color and delicious flavor, it’s perfect for special occasions or whenever you want to treat yourself. Easy to make and fun to customize, these cookies recipe will quickly become a favorite in your baking repertoire. Happy baking!
If you like it, Leave a Comment !
There are no reviews yet. Be the first one to write one.